CLICK HERE FOR FREE BLOGGER TEMPLATES, LINK BUTTONS AND MORE! »
Showing posts with label flowers. Show all posts

Saturday, April 7, 2012

Day Seven of the Spring Blog Hop

 
Day Seven is here, let me just say that whoever wins my blog candy is gonna be happy happy happy! I've been getting together my prize package, woohoo! On day nine I will reveal what I'm giving away and announce the winner! Remember you can have eight chances to win! Just make sure your listed as one of my "followers" and then just comment on each day's post. Only one comment per day. If you missed out on some of the earlier days, no worries just go back take a peek and comment! Then you can win again if you do the same thing on the other Blog Hope Bloggers Post!


Ok, so for today I made a card using the Webster Pages trend setter line along with a journal card from the journaling card set. I sewed, distressed, inked (and yes in that order) Added some bling, pearls, and ribbon. The flower was just white, I misted it then added the bling from Petaloo Tiffany's Treasures Thanks for stopping by!

Now go check out the other blog hoppers!

Bea ~ Amazing Grace
Liz ~ Scrapping Lizzie
Mindy ~  Pretty little paper love
Veronica ~ KitsnBits

Tuesday, April 3, 2012

Day three of the Spring Blog Hop!


So today I have an album to show you, I guess you could call it a mini album, but its not real mini. Its a gate folded album I made out of chipboard and it will hold quite a bit of pictures. It has lots of tags and pockets.
I covered the binding with grungeboard. I used my Lindy's Spray to color the grungeboard to match. I also colored my flowers in the same spray. I used My Mind's Eye paper through out the album.


Thanks for taking the time to stop by and check out my projects! To be entered in the giveaway, just remember to make sure your a follower on my blog and leave a comment. You can be entered everyday if you leave a comment everyday . . . That could be a total of 8 entry's!

Now be sure and go visit the other blogs in the Spring Blog Hop and enter to win on there blogs too!

Bea ~ Amazing Grace
Liz ~ Scrapping Lizzie
Mindy ~  Pretty little paper love
Veronica ~ KitsnBits


Sunday, April 1, 2012

Spring Blog Hop!


Yeah, it's finally here, our Spring Blog Hop! We've been planning and anticipating this day for awhile now!


Here's how it works, starting today April 1st - April 8th I will share an Easter/Spring themed project with you and all you have to do is become a follower of my blog and leave a comment (one comment per day). Each day I will enter everyone's names that commented into a drawing, so if you comment everyday for the 8 days you have 8 chances to win!  But it gets better because after you visit my blog and comment on my project then you can visit my other four talented blog friends, follow them and comment on there projects and again on April 9th they will each be giving away something wonderful! So you have lots of chances to win! Hopefully we will inspire you all to create some pretty spring projects!

Here's my first project  . . . I created a bird cage and pedestal using my Silhouette Cameo and some svg files from SVG Cuts. First let me say I *love* my Silhuette Cameo I could go on and on about it but I will save that for another post! I also love SVG Cuts they have some wonderful reasonable priced SVG kits and they even have video tutorial showing you how to put them together! This project was made by using the kits Playful Parlour, for the bird cage  Poplar Street Tulips for the fancy pedestal, and Happy Birthday to You for the flowers on top. The yellow flowers were purchased from the Paper Niche. The white flowers are the ones I made. And of course no project of mine would be complete without a little bling, ok so alot of bling!


 All I can say is this is one spoiled bird that lived in this cage, not sure why he would make a break for it but I sure like the blinged up egg he left me!


Ok, so make sure you are a follower of my blog, leave a comment and I will place your name in the drawing! The other ladies participating  in the blog hop are listed below, don't forget to check out there blogs, follow them and leave a comment!

Bea ~ Amazing Grace
Liz ~ Scrapping Lizzie
Mindy ~  Pretty little paper love
Veronica ~ KitsnBits

Sunday, February 5, 2012

Paper Niche February Kit

Loved this kit, it has some of my favorite manufactures of paper in it, like Simple Stories and Basic Grey. Lots of Valentine goodies in this one! So for this month I made an album, a stationary box filled with 6 cards, 6 mini note cards,  6 tags, two layouts, an easal card, and I still had some paper left over!

First up is the album I made using the Simple Stories paper that came in our kit. The base of my album is coin envelopes that you purchase at your local office supply store. I covered these with the paper and made some hinges out of card stock to hold it all together. My plan is for each envelope to be a month of the year so that I can stick a picture or two and some journaling in there every month and it the end of this year it will be a mini year in review album.

Here's a photo of the front and back


Here are some of the inside pages, I made tags that pull out of the pages as well


Ok, so here's the stationary box I made. It may just look like an ordinary box but wait till you see the inside!


It holds six full size cards, six mini note cards, and six gift tags. Along with a mini notebook to jot down birth-dates and etc and a pocket for your stamps. This would make a great gift to give someone.

OK, next up is the two layouts I made in honor of Valentines day this month


Here are some close up shots


And finally another Valentine Day easel  card


I hope I inspired you for Valentines Day. Don't forget to check out the Paper Niche to see what the other designers created!


Thursday, January 5, 2012

Paper Niche January Monthly Kit

I'm back to show you what I created with the Paper Niche January Monthly Kit. I tried something new in this kit although I'm not much of a card maker, I ended up making two easel cards, which was surprisingly really easy to make and I do believe I've caught the bug! I'm sure you are gonna see lots more cards from me in the near future!

OK, so we will start off with a graphic 45 chipboard box that I purchased at the Paper Niche. It comes plain and ready to alter with an accordion album inside.


For the inside of the album I wanted to keep it simple since it was small so all you would have to do is add your pictures. I just distressed and inked all the edges of the papers and machine sewed around the edges.

Ok, here are the easel cards I was telling you about, I love the way you can sit them up for display but yet they close flat for an envelope.


And lastly here's a layout I did of my sister-in- law who passed away last October, Destiny. She loved her horses and thats what I wanted to convey in this layout.


Here's a close up of the chipboard letters we received in our kit. I inked them with two different colors of ink then I covered them in glossy accent to give them some dimension.


You can visit the Paper Niche Blog to see what the other designers did with there kits!

Monday, October 3, 2011

Glue Flowers

OK, as I promised you all here's a tutorial on how I made the cute little flowers as shown in the Paper Niche October sneak peak.

Let me first start out by saying I cannot take credit for coming up with this idea, that belongs to Jo from Itsmycreativeworld. I've embedded her video below. So watch that first, she does a great job of explaining how do everything. To listen to the Video just scroll all the way down to the bottom of my page and pause the music player.


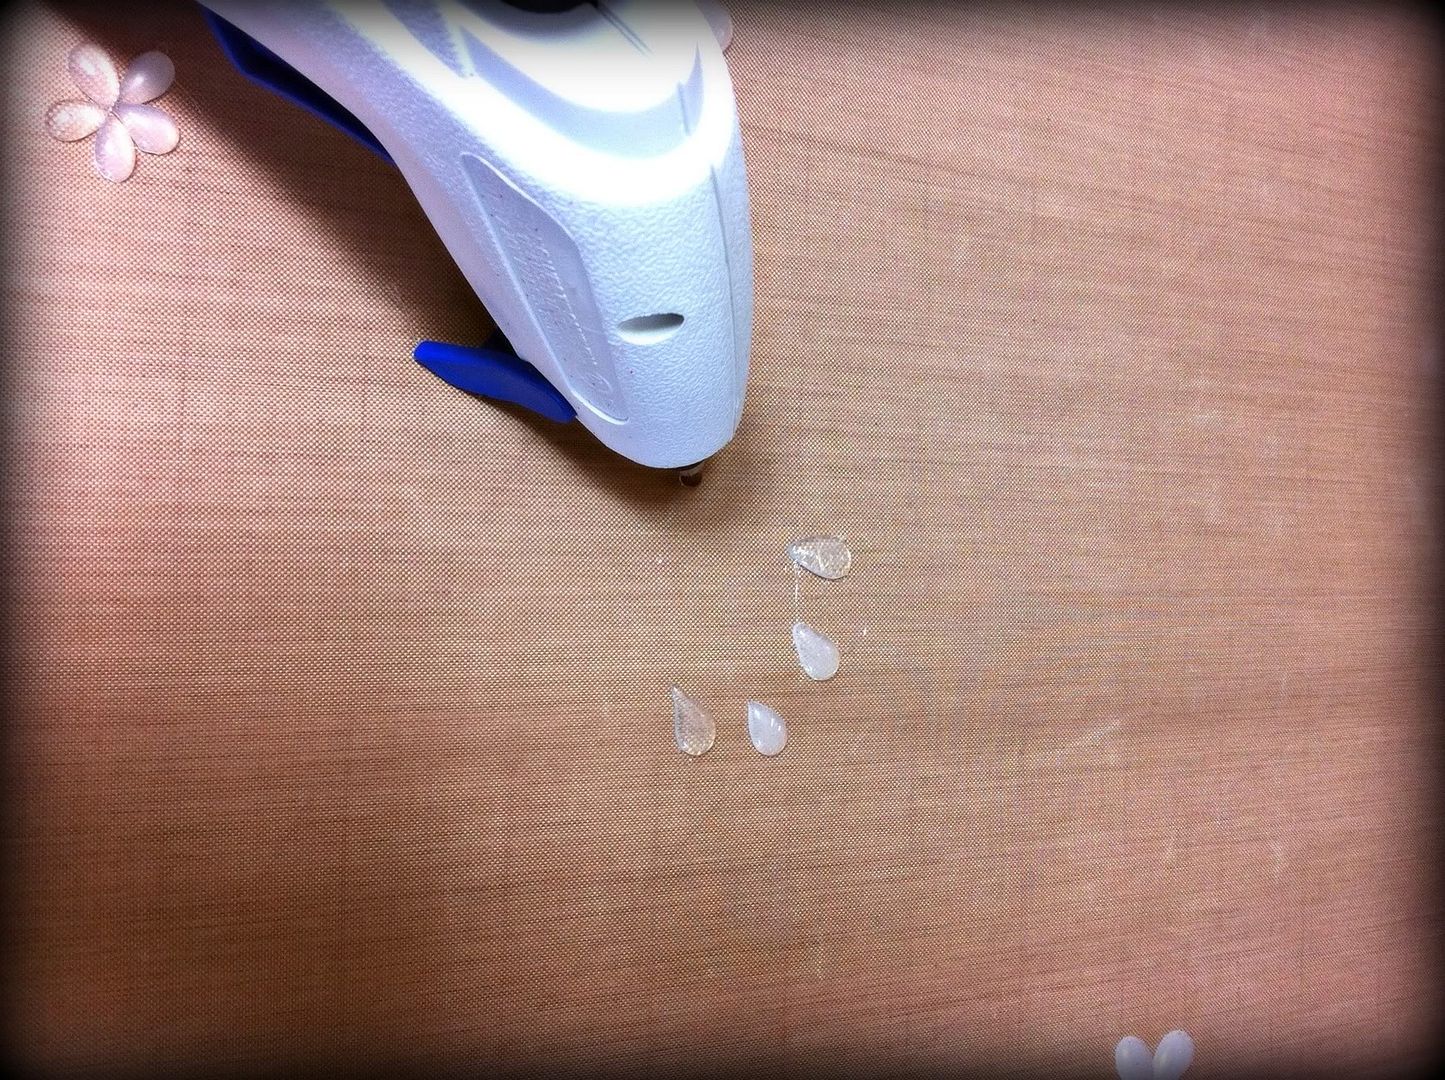
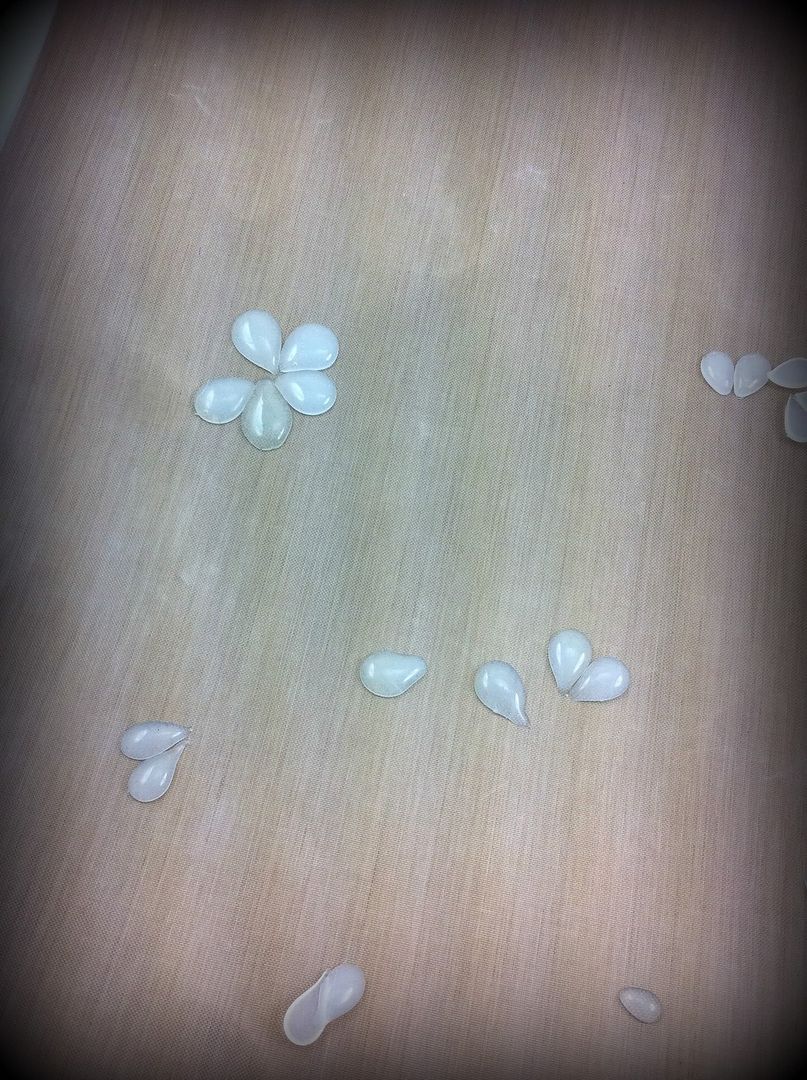
And here's a few pictures of my process

First I just make a bunch of random petals, this takes some practice and keep in mind how big you want your petals to be.


Next, I start by putting my petals together that are similar in size and making my flowers. When I get them all together, that's when I put just a little hot glue in the center to hole them all together.


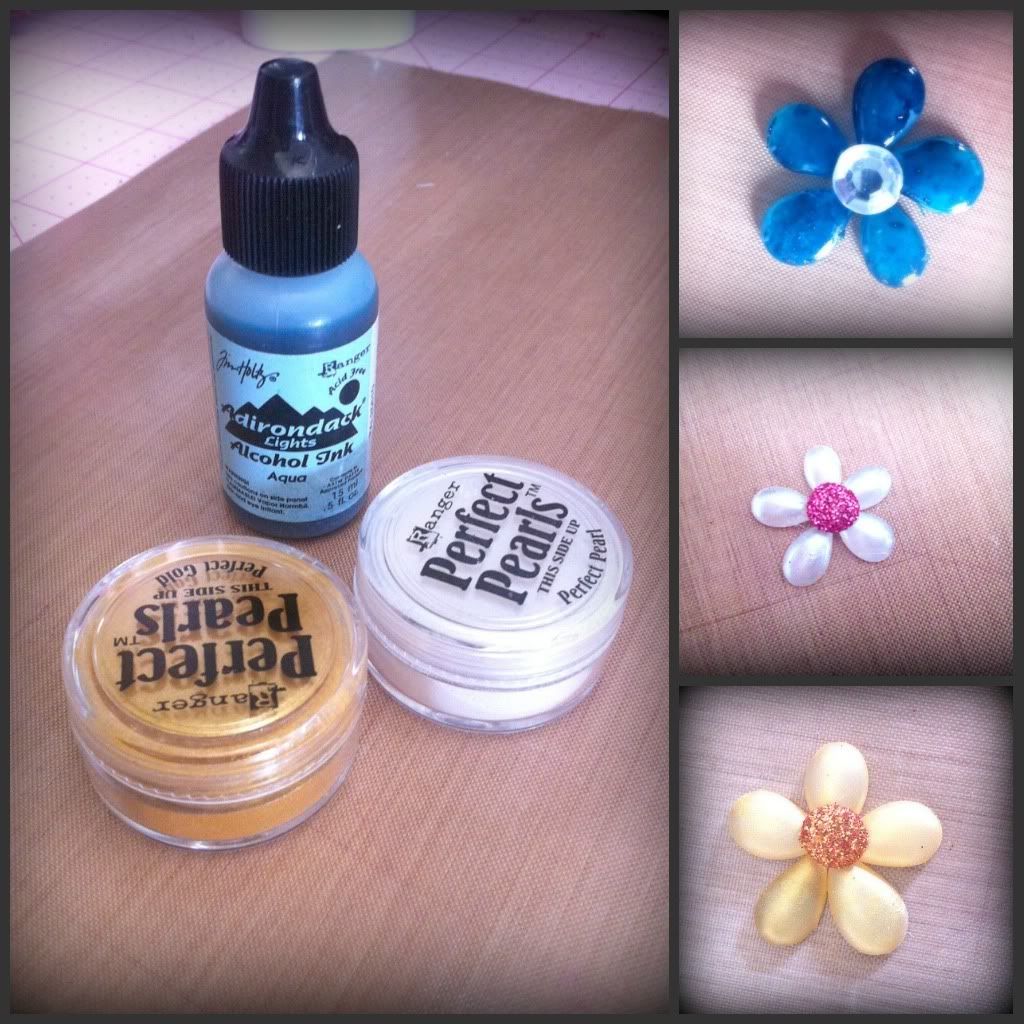
 Now is when you can rub your perfect pearls on your petals or you can try just dropping some alcohol inks right on them. It you want the color to be more transparent when applying the alcohol inks, just put the ink down on your craft mat and set your petals on top of it so the color just goes on the bottom. But, you do have to make sure you remove all the little glue string off your petals before applying the alcohol inks, because it does show up more than with the perfect pearls.


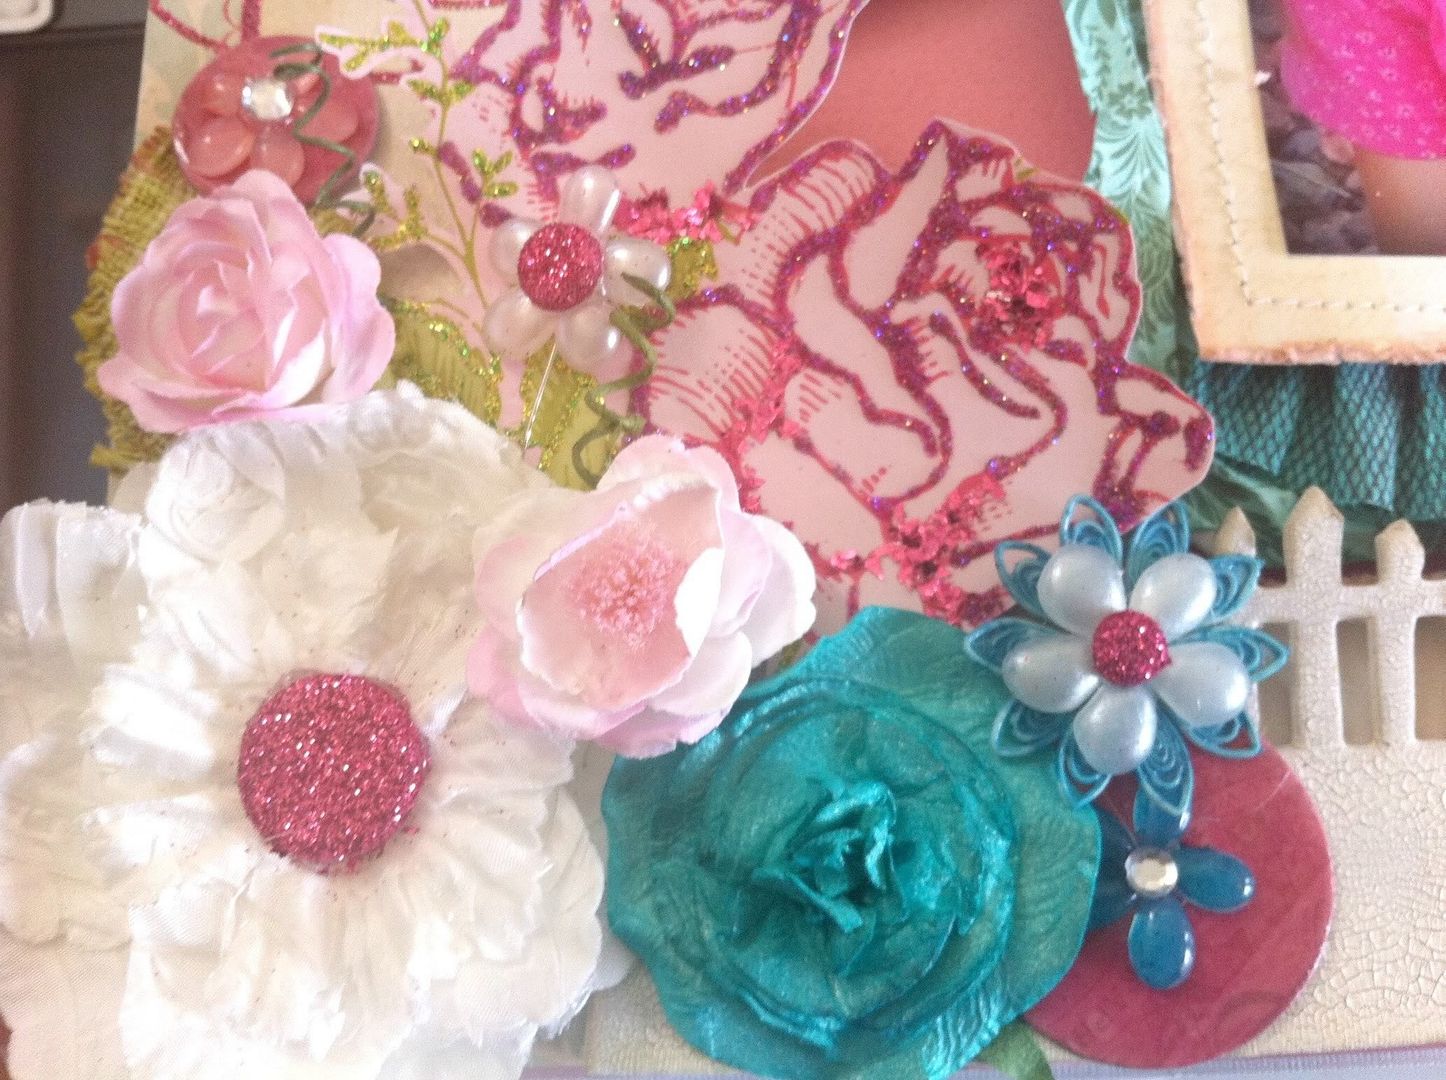
In this layout you can see I made 3 different flowers. Two are the same I just put one on a stick pin like June  did in her video. Two I used perfect pearls on and the other two I applied alcohol inks. You could also make your own little flat back pearls or even hearts and butterflies using the same technique of the shape of the petals. 


I hope you all give this a try and post a comment letting me know how you like it! 


Thursday, September 29, 2011

October Sneak Peaks

Hi Everyone, Its time to reveal my sneak peaks for the The Paper Niche  October kit. I had so much fun creating these layouts I tried some new techniques out. If you will notice the cute little white with pink glitter center flower and the turquoise one with the rhinestone center . . .  those are the new ones I learned how to make and I'm gonna show you! But you'll have to wait till the October reveal! Its so simple to make and you can make other embellishments too using this simple technique. Also check out the Paper Niche Blog to see all the other designers sneak peaks!


Thanks for stopping by and don't forget to come back Oct. 1st  to see the rest of the pages and learn a new technique!

Friday, July 8, 2011

Envelope Album

Here's an envelope album I did using a combination of the 6x9 office envelopes and no. 6 coin envelopes. I used several different cutting and folding techniques so the pages aren't all the same. I hope to do a video soon showing how I made it. The flowers were dipped in Utee which gives them the glossy effect. the album is pretty thick with lots of tags and pockets.